Customizing Spring Security
Spring / December 17, 2018
In this post I want to explain how Spring Security can be customized since it seems to be difficult to find any solid documentation around this available on internet. I am going to use a custom API Key based authentication example to demonstrate how Spring Security can be configured for your needs.
I am going to create three things to get this done.
- A Token to hold the
principaland thecredentials - A Filter to create the aforementioned Token from the request, authenticate that using the
AuthenticationManagerand place theAuthenticationin theSecurityContextHolder. - An Authentication Provider to be used by the
AuthenticationManagerto authenticate the Token.
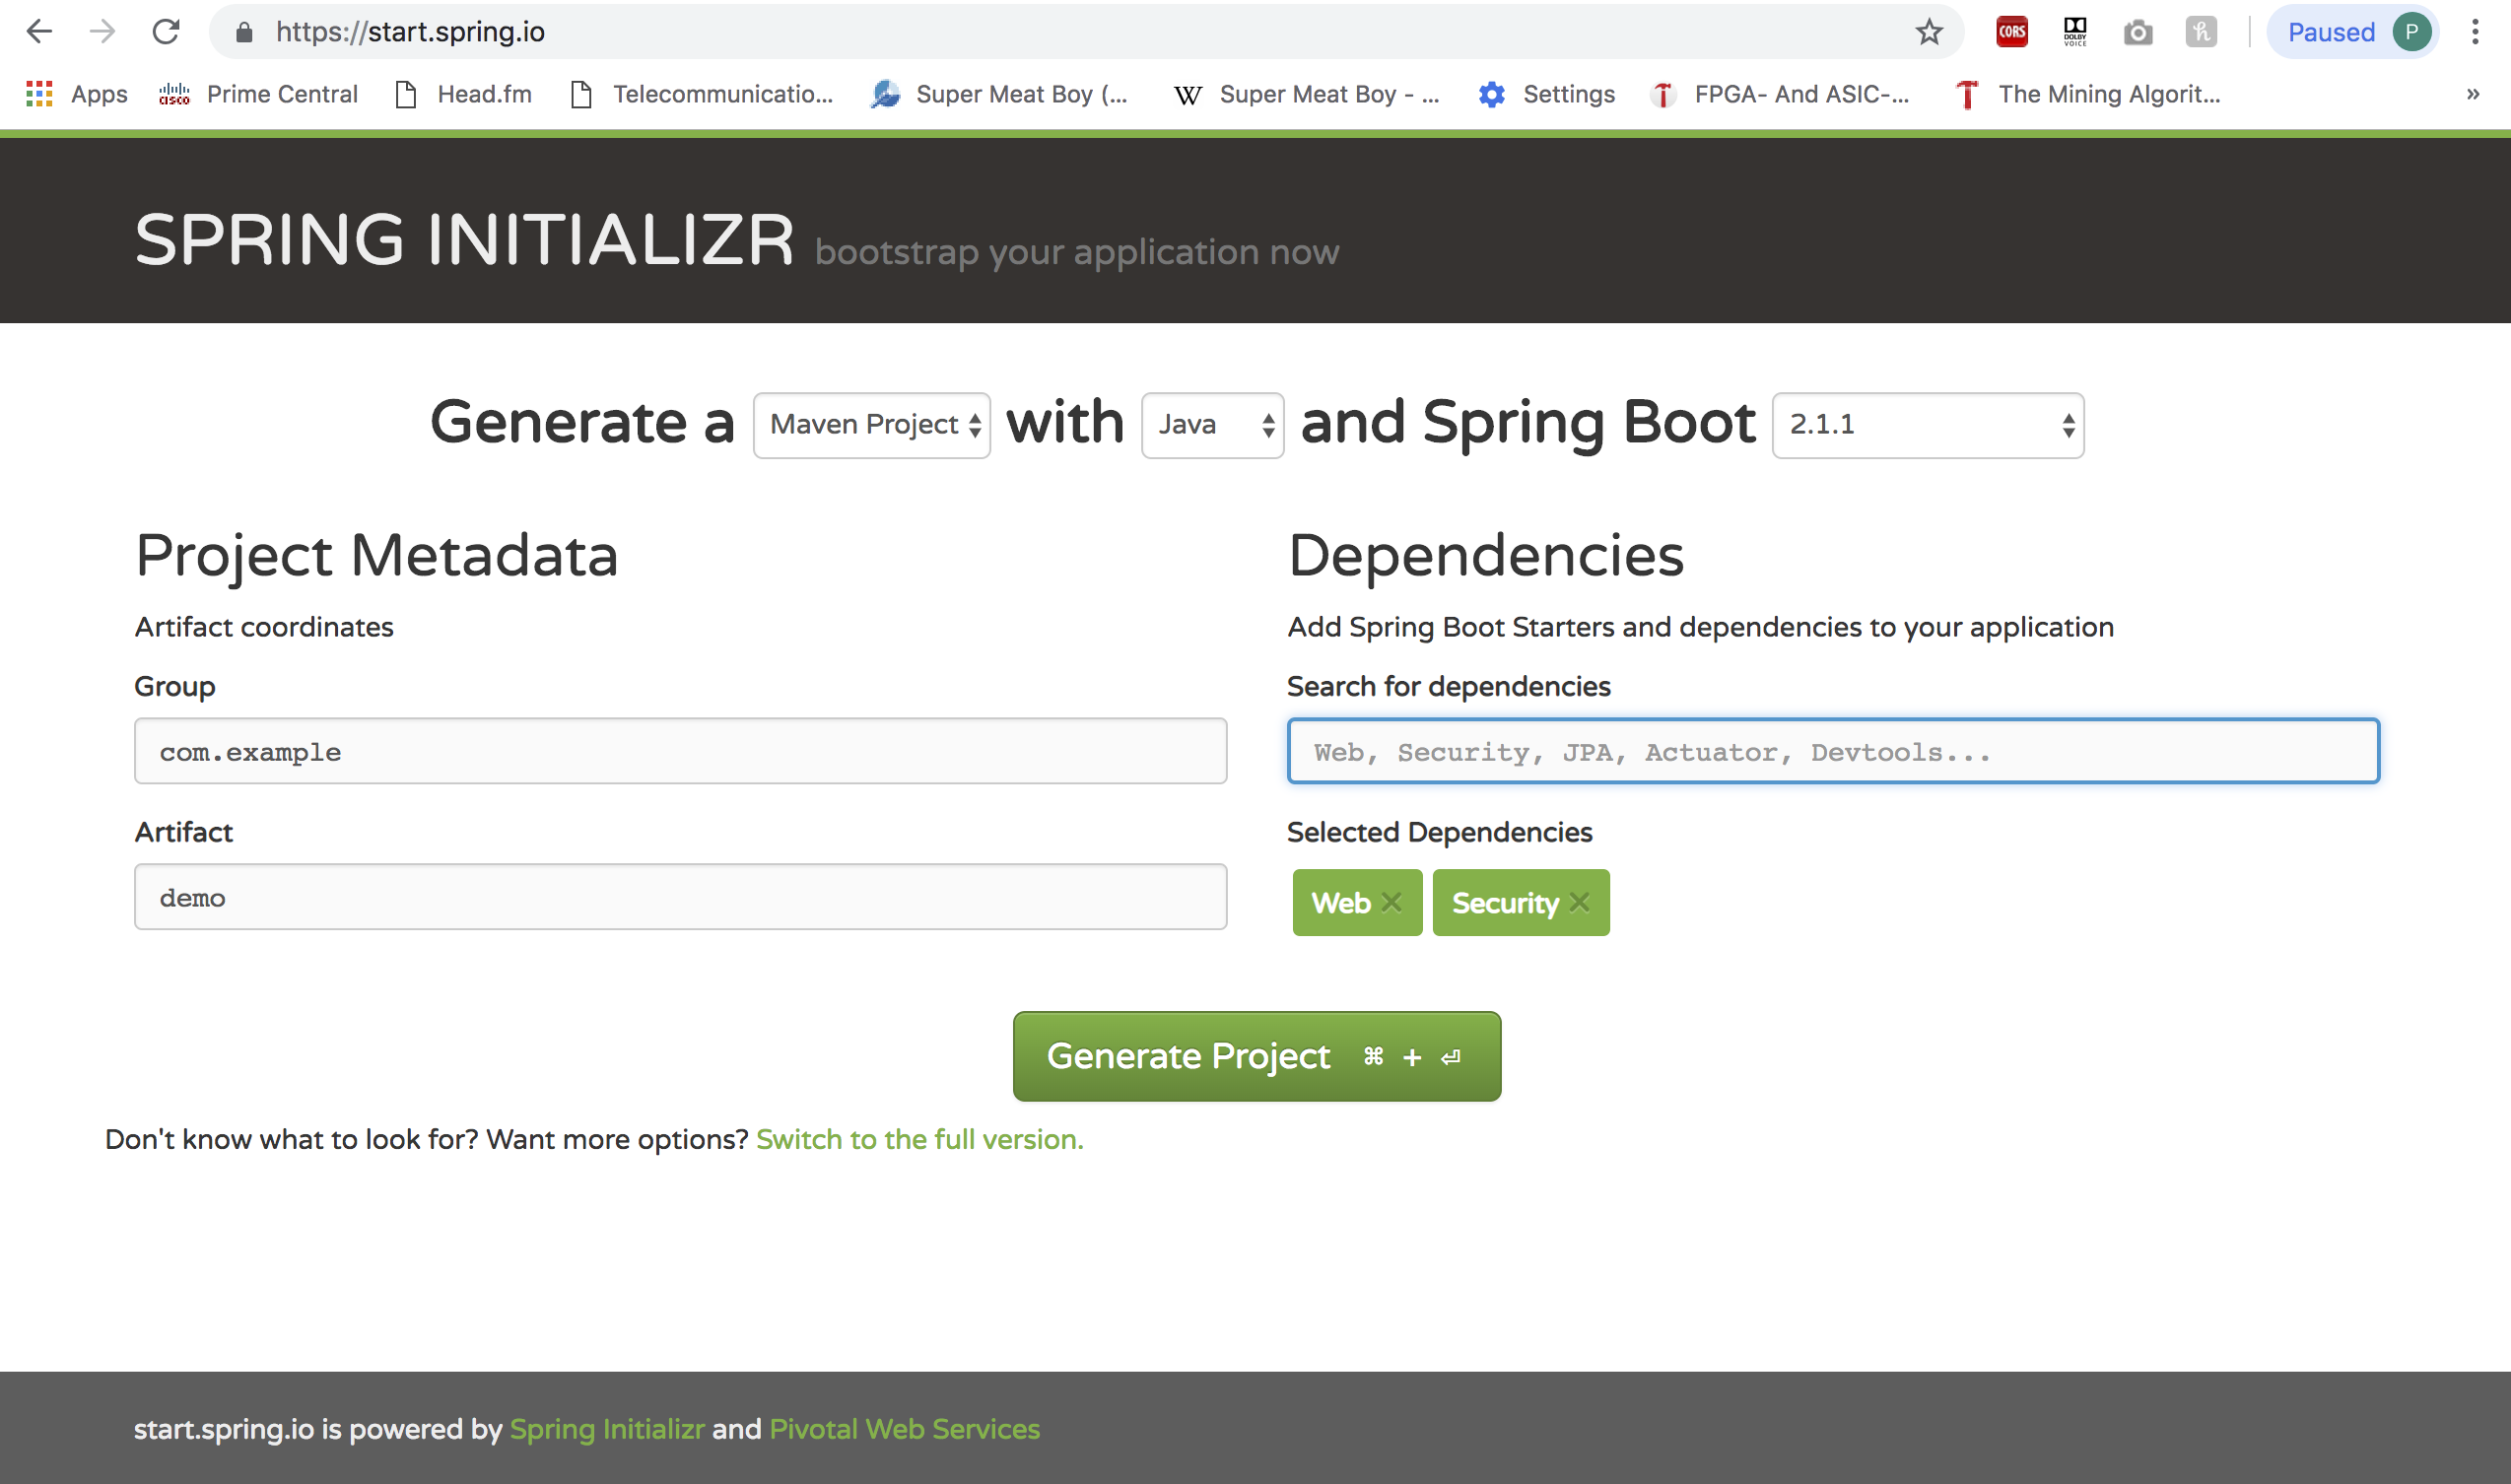
I will begin by creating a Spring Boot Project using Spring Initializr. I will need two dependencies here; Web and Security.
Once I have the project running on my favorite IDE, I am going to create two packages called config and security. I will use the former to keep my Security Configuration file and the latter to keep the Token, Filter and the Authentication Provider. You really don’t have to stick to this package structure. You can do whatever you want with your package structure as long as that makes sense to you and the folks writing the code.
Next Steps
Create the Custom Authentication Token
The Custom Authentication Token will hold the apiKey.
public class ApiKeyAuthenticationToken extends AbstractAuthenticationToken {

    private String apiKey;

    public ApiKeyAuthenticationToken(String apiKey) {
        super(AuthorityUtils.NO_AUTHORITIES);
        this.apiKey = apiKey;
    }

    @Override
    public Object getCredentials() {
        return this.apiKey;
    }

    @Override
    public Object getPrincipal() {
        return "admin";
    }
}
Create the Custom Authentication Provider which supports ApiKeyAuthenticationToken to authenticate the Custom Token we just created
I will first add the my API Key to application.properties.
security.api-key=abcThe Custom Authentication Provider will check if the API Key is valid. If it is not, the Authentication Provider will throw an Exception. In a Production Application you may create a Custom Exception which will be handled gracefully with the correct HTTP response code.
@Component
public class ApiKeyAuthenticationProvider implements AuthenticationProvider {

    @Value("${security.api-key}")
    private String apiKey;

    @Override
    public Authentication authenticate(Authentication authentication) throws AuthenticationException {

        ApiKeyAuthenticationToken apiKeyAuthenticationToken = (ApiKeyAuthenticationToken)authentication;
        if(apiKeyAuthenticationToken.getCredentials().equals(apiKey)) {
            apiKeyAuthenticationToken.setAuthenticated(true);
        } else {
            throw new BadCredentialsException("Invalid API Key");
        }
        return  apiKeyAuthenticationToken;
    }

    @Override
    public boolean supports(Class<?> aClass) {
        return aClass.equals(ApiKeyAuthenticationToken.class);
    }
}
Create the Filter which creates the Token and asks the Authentication Manager to authenticate that Token
public class ApiKeyAuthenticationFilter extends GenericFilterBean {

    private AuthenticationManager authenticationManager;

    public ApiKeyAuthenticationFilter(AuthenticationManager authenticationManager) {
        this.authenticationManager = authenticationManager;
    }

    @Override
    public void doFilter(ServletRequest servletRequest, ServletResponse servletResponse, FilterChain filterChain) throws IOException, ServletException {

        HttpServletRequest httpServletRequest = (HttpServletRequest)servletRequest;
        HttpServletResponse httpServletResponse = (HttpServletResponse)servletResponse;

        Optional<String> apiKey = Optional.ofNullable(httpServletRequest.getHeader("X-Api-Key"));

        if(apiKey.isPresent()) {
            ApiKeyAuthenticationToken apiKeyAuthenticationToken = new ApiKeyAuthenticationToken(apiKey.get());
            SecurityContextHolder.getContext().setAuthentication(authenticationManager.authenticate(apiKeyAuthenticationToken));
        }
        filterChain.doFilter(httpServletRequest, httpServletResponse);
    }
}
Update the Security Configuration
The Security Configuration class that extends WebSecurityConfigurerAdapter annotated with @EnableWebSecurity.
@Configuration
@EnableWebSecurity
public class SecurityConfig extends WebSecurityConfigurerAdapter {

    // Rest of the code
}
Now I will override the configure methods to customize my security configuration.
@Override
protected void configure(HttpSecurity http) throws Exception {

    // Section 1
    http.
            httpBasic().disable().
            csrf().disable().
            sessionManagement().sessionCreationPolicy(SessionCreationPolicy.STATELESS);

    // Section 2
    http.
            antMatcher("/public/**").
            authorizeRequests().
            anyRequest().permitAll();

    // Section 3
    http.
            antMatcher("/protected/**").
            authorizeRequests().
            anyRequest().authenticated().
            and().
            addFilterBefore(new ApiKeyAuthenticationFilter(authenticationManager()), UsernamePasswordAuthenticationFilter.class);
}
Section 1 disables Basic Authentication( which is enabled by default), CSRF and Cookies( you will not see the JSESSIONID now) for all requests.
Section 2 permits all traffic to public endpoints.
Section 3 adds our custom filter for all protected endpoints.
I will use the code snippet below to configure Authentication Manager to use the Custom Authentication Provider.
@Override
protected void configure(AuthenticationManagerBuilder auth) throws Exception {
    auth.authenticationProvider(apiKeyAuthenticationProvider);
}
Write the Controllers
I will now create another package for controllers called controller and write two GET methods there.
@RestController
public class SampleController {
@GetMapping("/public/message")
public String tellSomething() {
return "Subscribe to PewDiePie...!!!";
}
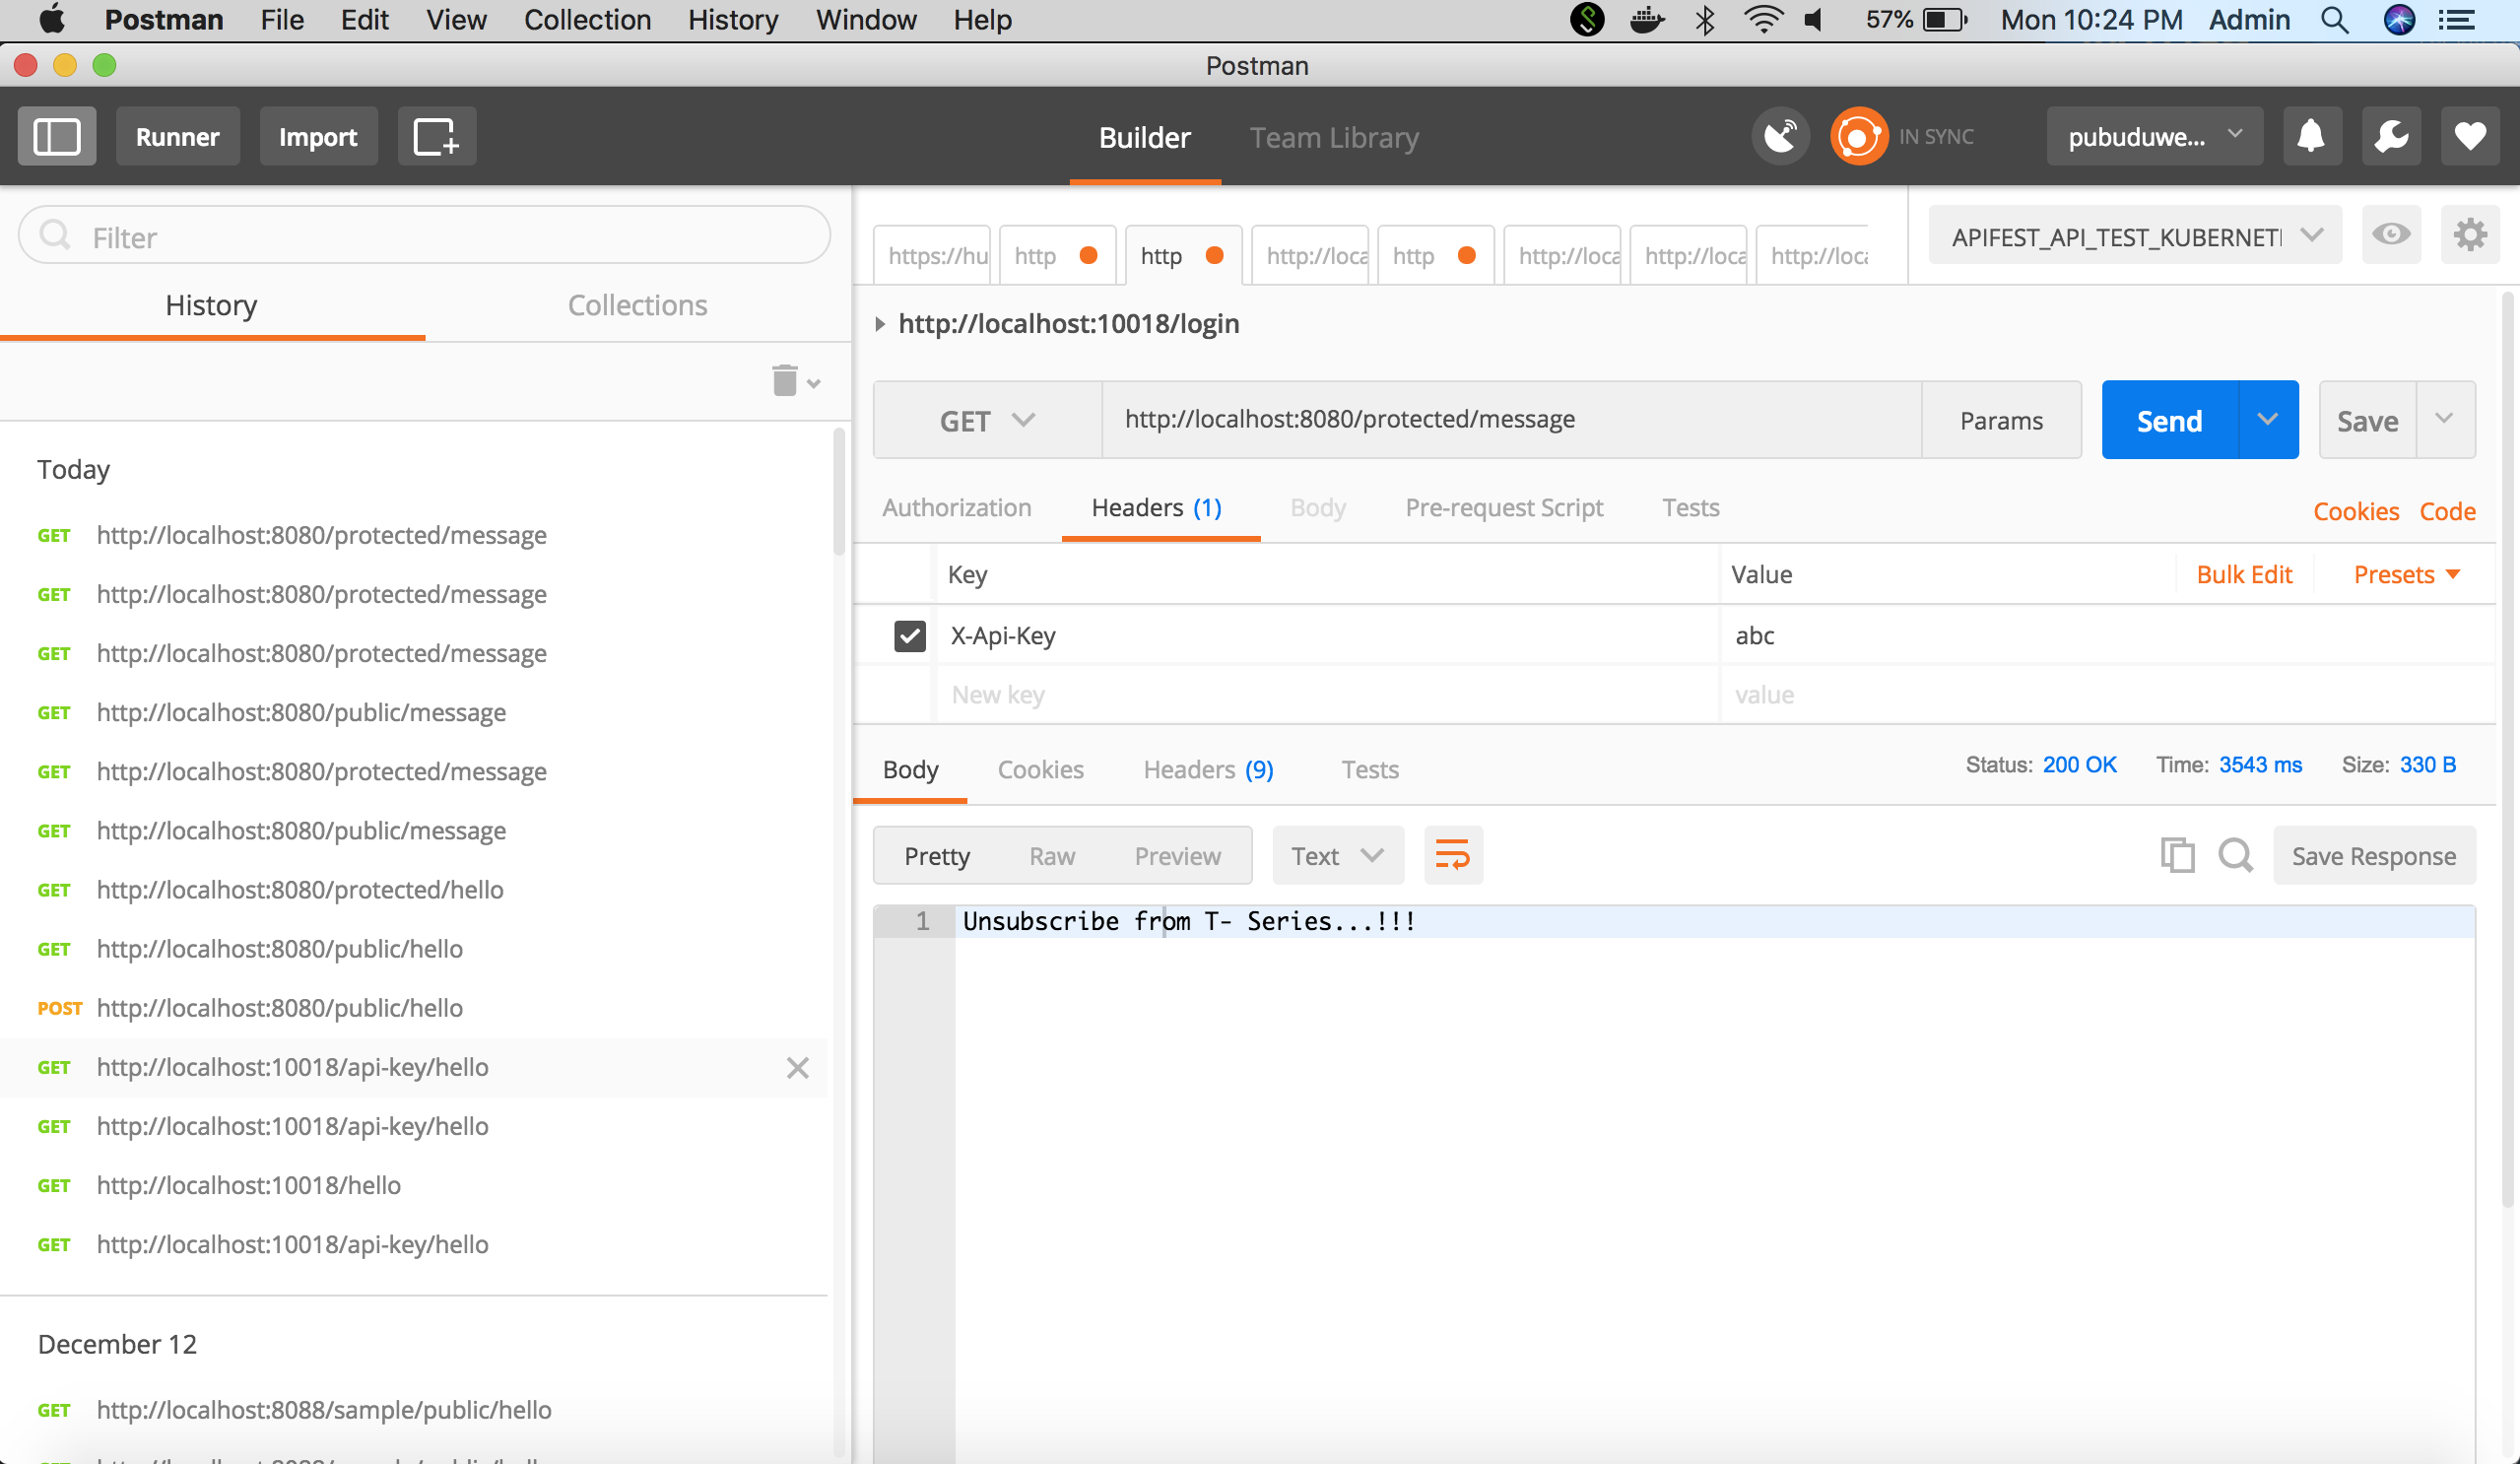
@GetMapping("/protected/message")
public String tellASecret() {
return "Unsubscribe from T- Series...!!!";
}
}Testing
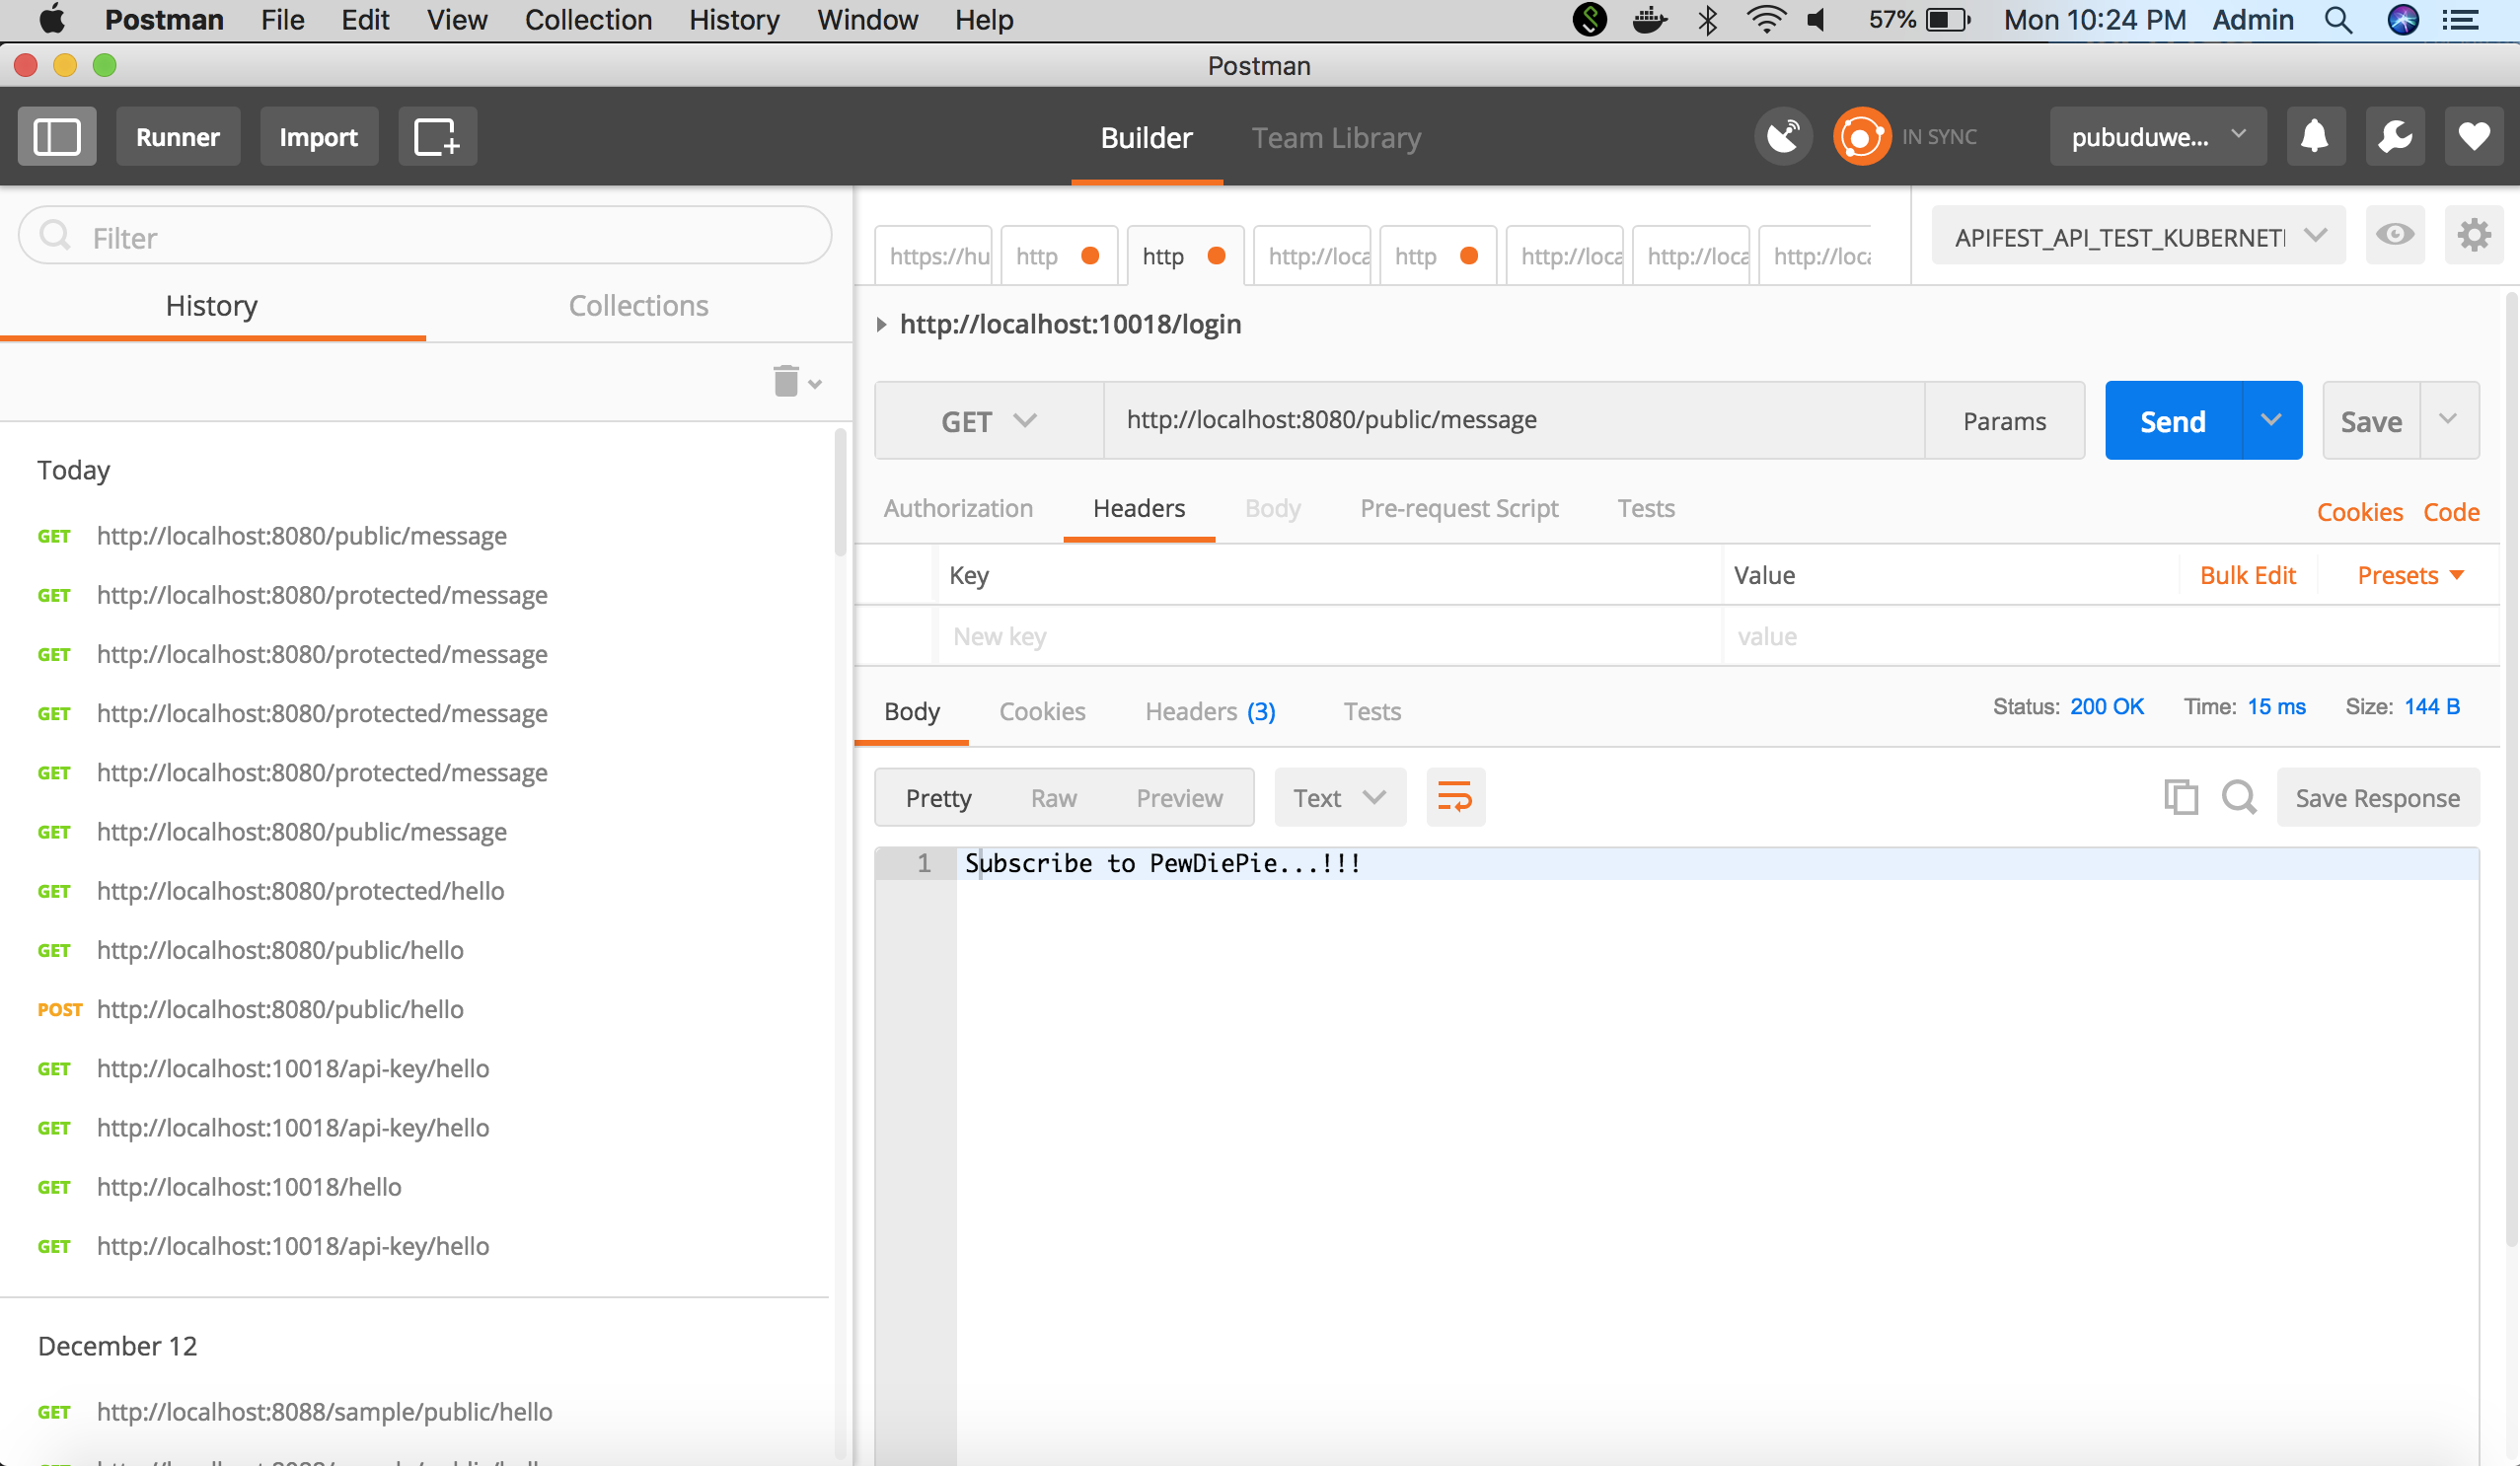
The public endpoint will respond without any API Keys.
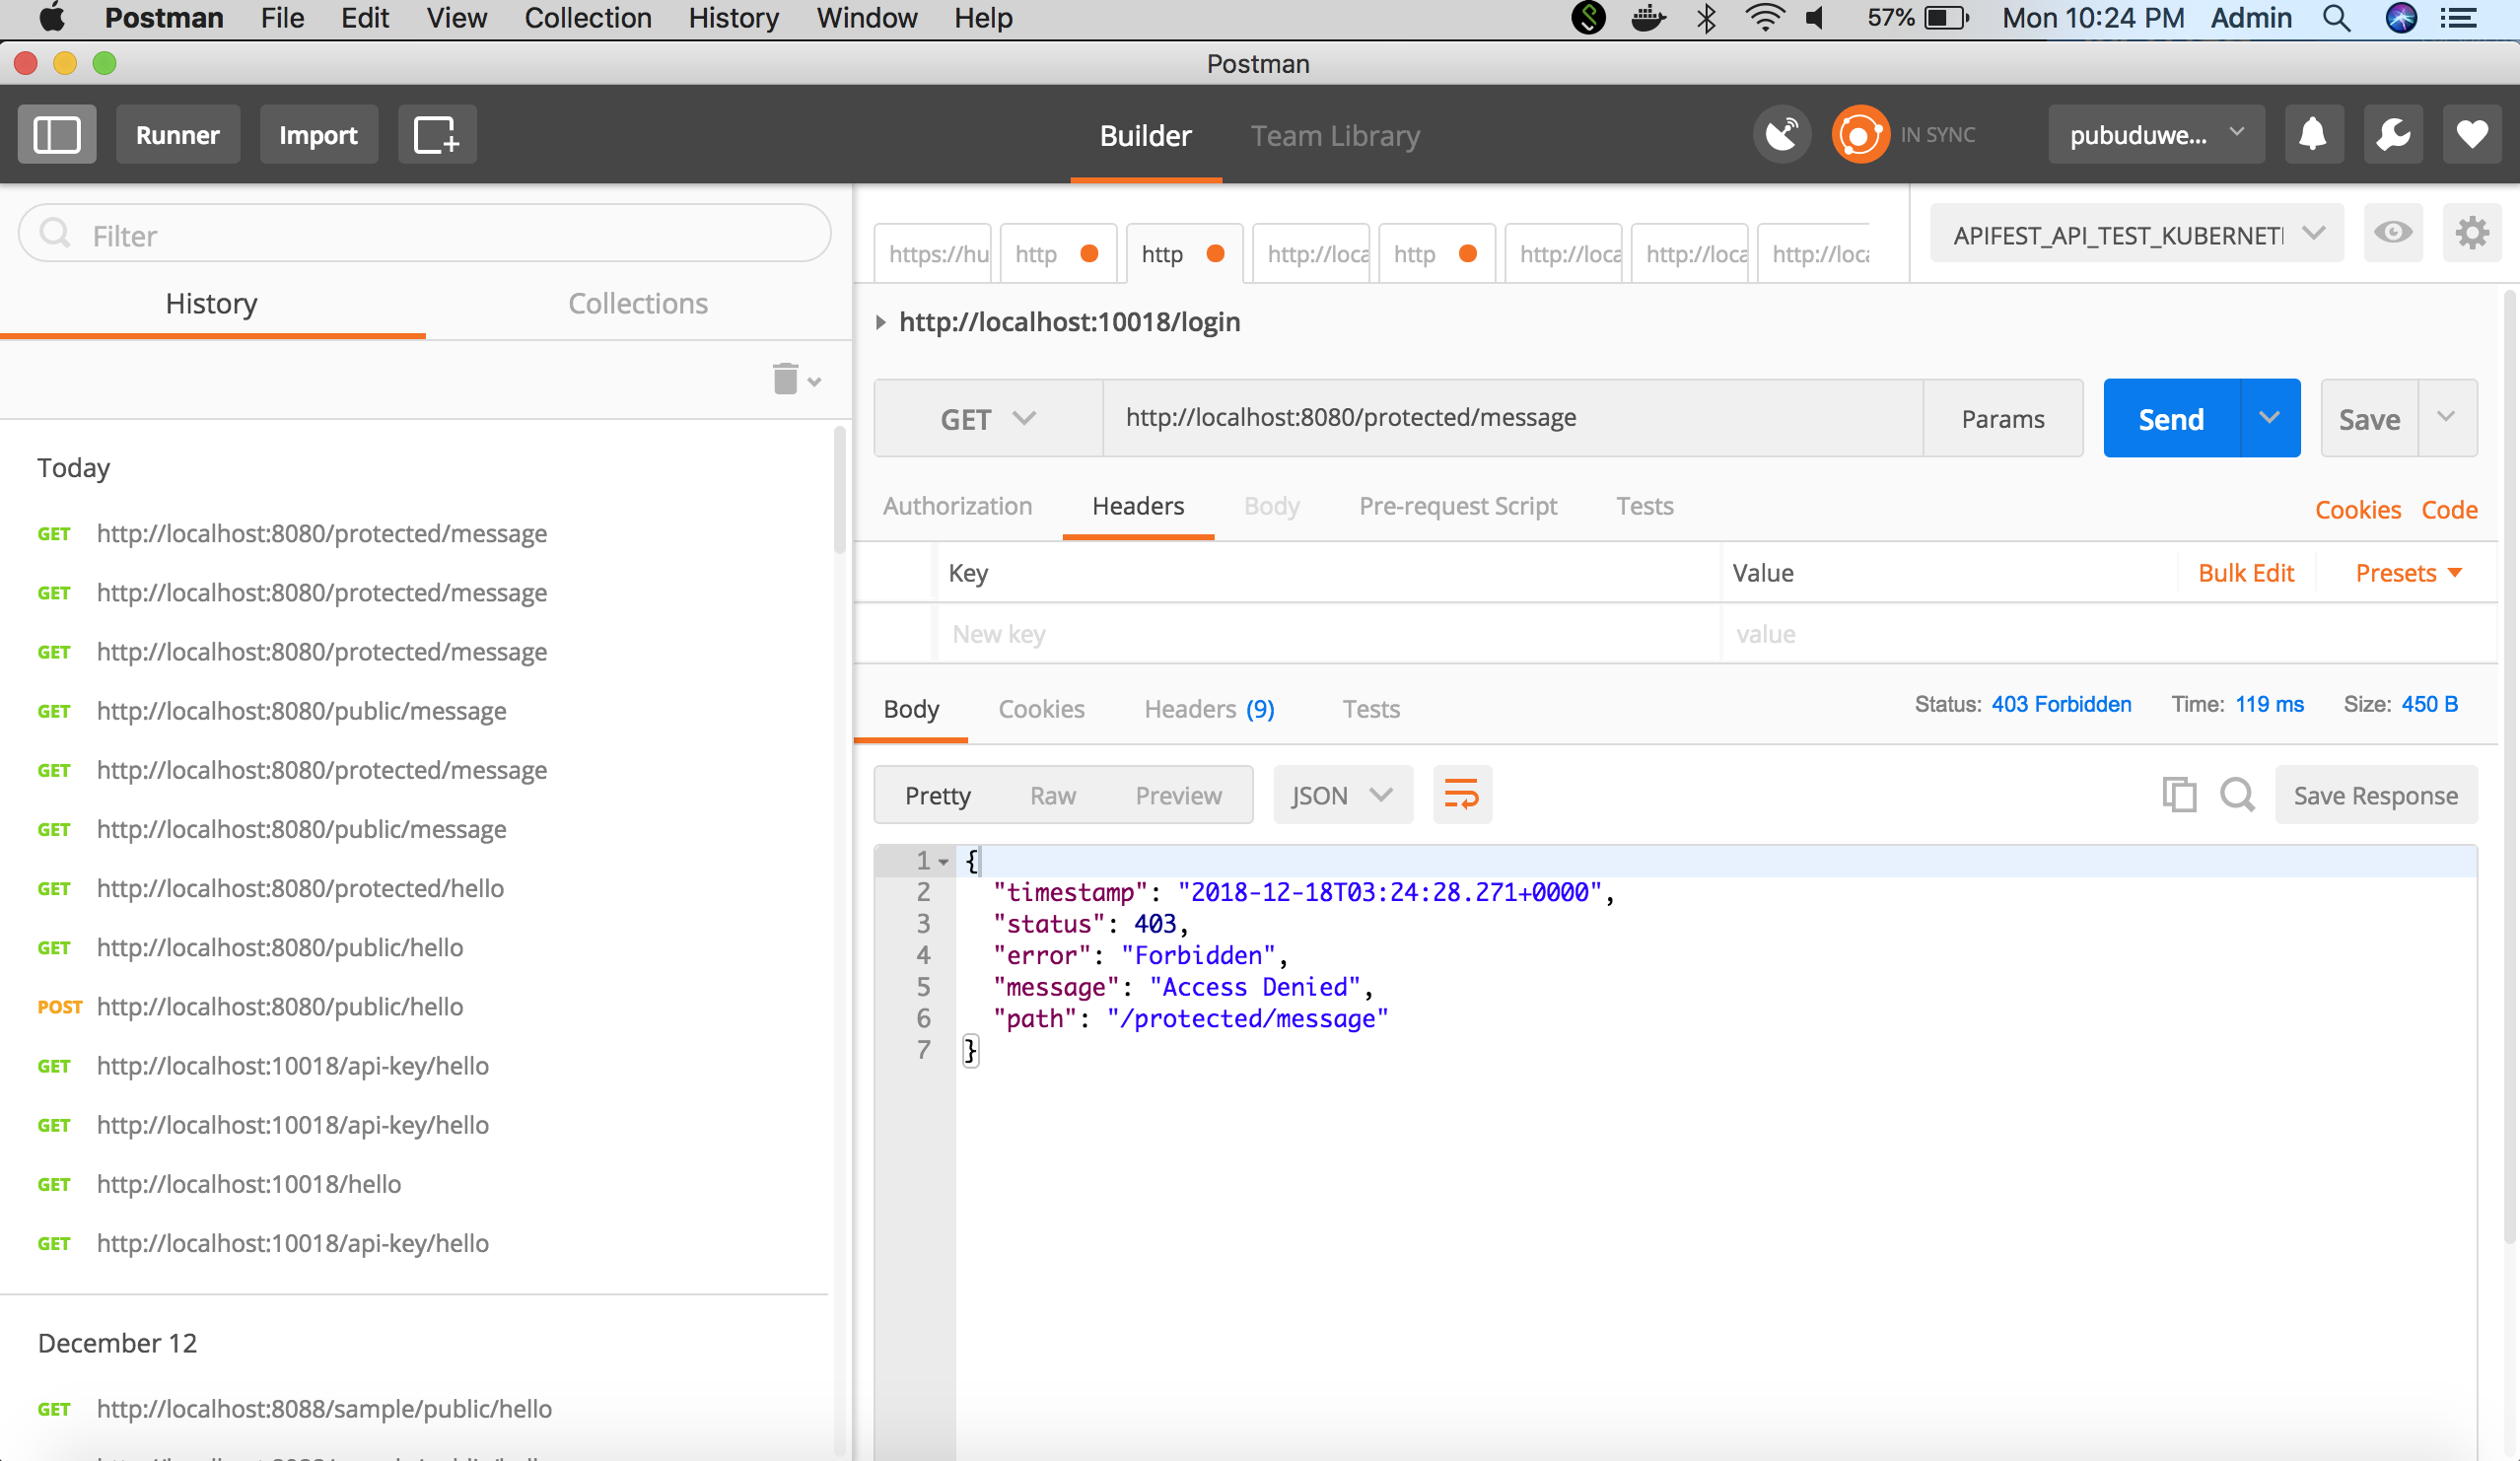
The protected endpoint will give an access denied error if the API Key is not sent in the Headers.
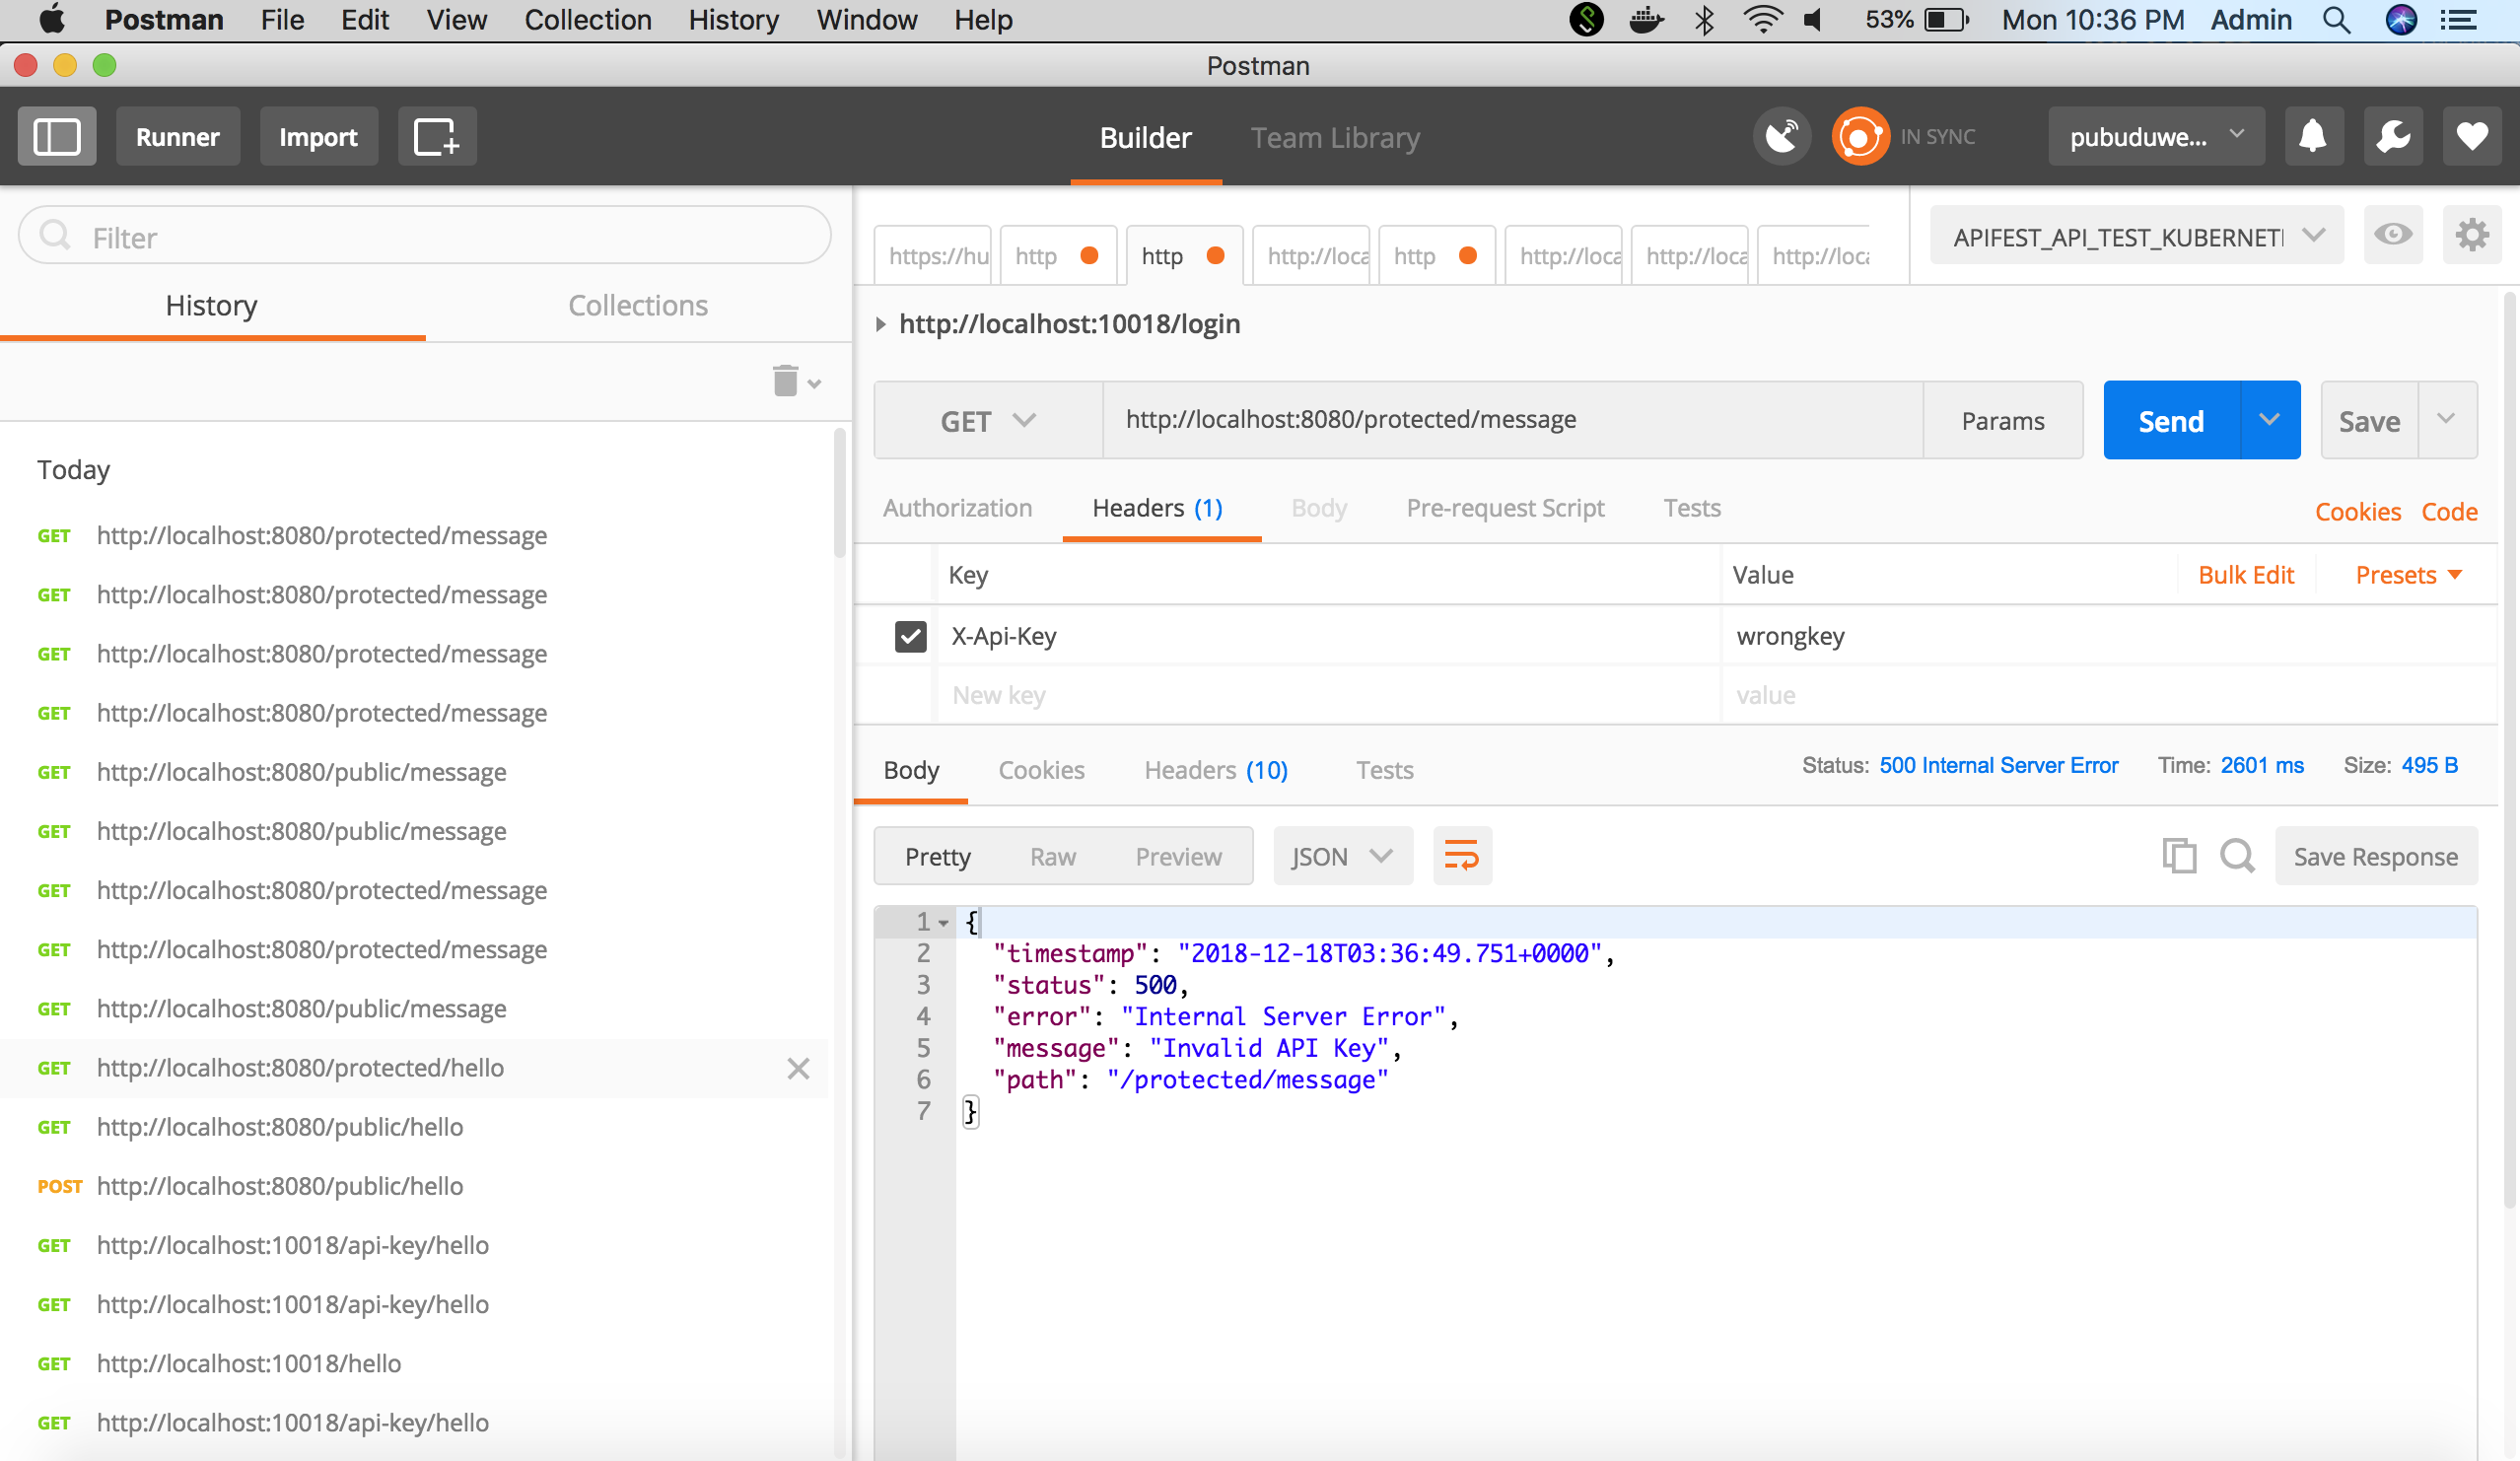
The protected endpoint will throw an error with the message “Invalid API Key”. Note that the HTTP Error code is 500. That needs to be handled with an Exception Handler.
The protected endpoint will respond if the correct API Key is sent.
Source code is available here.